Sunday 7 March 2021
Sunday Afternoon Art: Alexander Pope’s Grotto – Making textures and a 3D grotto
Join us for Sunday Afternoon Art and make your own textured grottos, by following the walkthrough below. Our family activities are aimed at children aged 4+ to complete with an adult.
This activity is being delivered in partnership with the Pope’s Grotto Preservation Trust and there is a short survey that will support us with delivering activities in future. You can complete the survey here: Pope’s Grotto Survey
Today’s activity has been created by Sasa Marinkov.
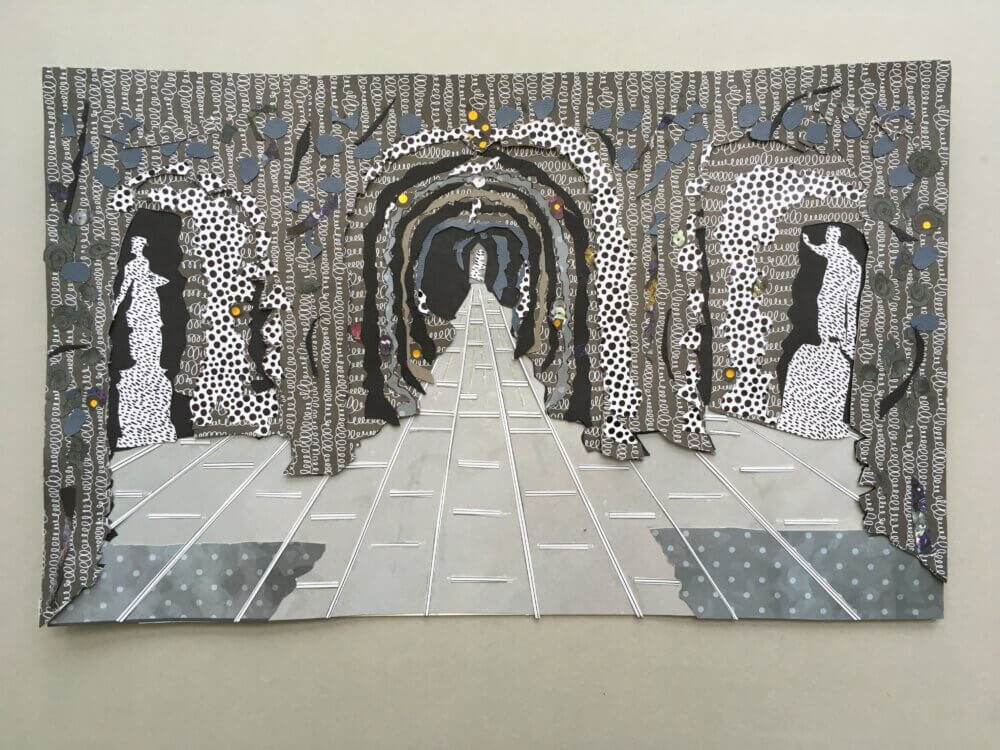
Pope’s Grotto is a man-made cave, made up of wonderful materials attached to the walls, from all over the UK and the rest of the world, such as rock, stone, petrified wood, fossils, glass, coral, shells and even humming-bird nests.
You can learn all about Pope and his Grotto with this downloadable information sheet.
You will:
- Make/collect lots of textures following the different ideas below.
- Arrange and collage your textures to make a grotto.
- Texture is the way things feel and look. They may be smooth, bumpy, fuzzy or rough for example. Different materials have different textures.
- Collage is how different materials are arranged and then stuck down.
Follow the walkthrough or download the walkthrough attached.
You will need:
Today’s activity is open and there are lots of materials that you can use. You don’t need to make all the textures so don’t worry if you don’t have all the materials to hand. Just use what you can. The materials in bold are the ones that you need, the rest are optional.
- Paper: variety of colours and styles if you have them
- Tin foil
- Mark making tools: Pencil, crayons, colouring pencils – whatever you have
- Glue stick or PVA glue
- Cardboard box from recycling
- Scissors
- Hole making tools, such as a hole punch or a kebab skewer
- Tool for making a hole in your box for light and a torch
- Tape – this can be useful if the glue isn’t strong enough to stick things down
- Ribbon, cotton thread
- Watercolour paint, poster/acrylic paint, brush and vegetables
Found objects such as bottle tops, or natural items from your garden or images from old magazines/newspapers
MAKING TEXTURES:
Before we make our grotto, we need to create and collect textures that we can use for the walls. Here are some ideas for making textures for walls, ceilings and floors of your Grotto.
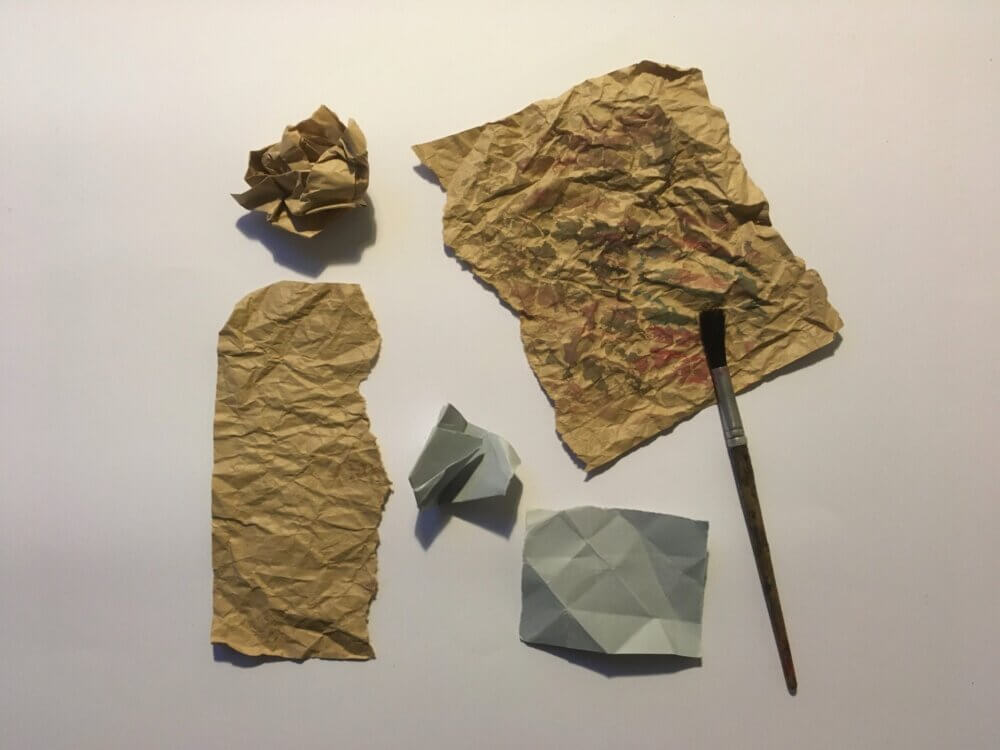
- Creasing paper:
-Screw up a sheet of brown paper tightly in your hand. Flatten out. Flick streaks of paint on the rough surface if you can or use a crayon.
-Fold another piece of paper with flat creases and keep folding smaller in different directions until you have a small bundle. Flatten out.
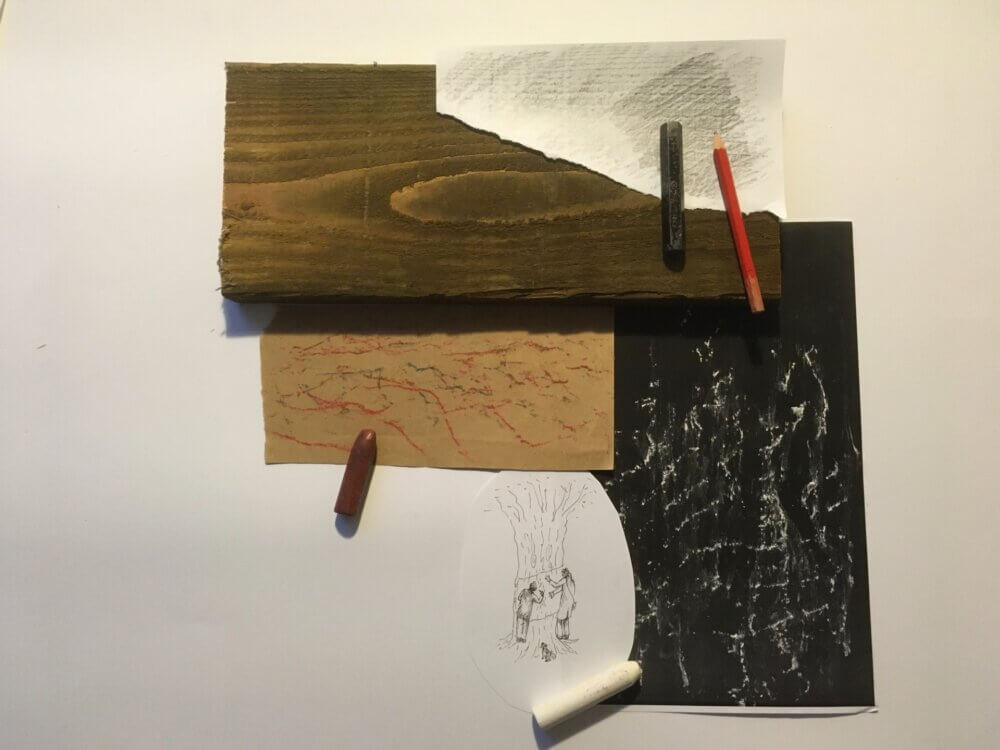
- Rubbings from textured surfaces:
Lay your paper on a textured surface and hold steady with one hand. Use chalk, wax crayon or pencils to rub over the surface keeping the paper in place. This works best with smooth papers and the side of the chalk/crayon, not the tip.
Suggestions: tree trunks work well for bark patterns. Ask someone to help you hold the paper edges. Some old wooden floors have textures. Look in your kitchen for textures on plastic items.
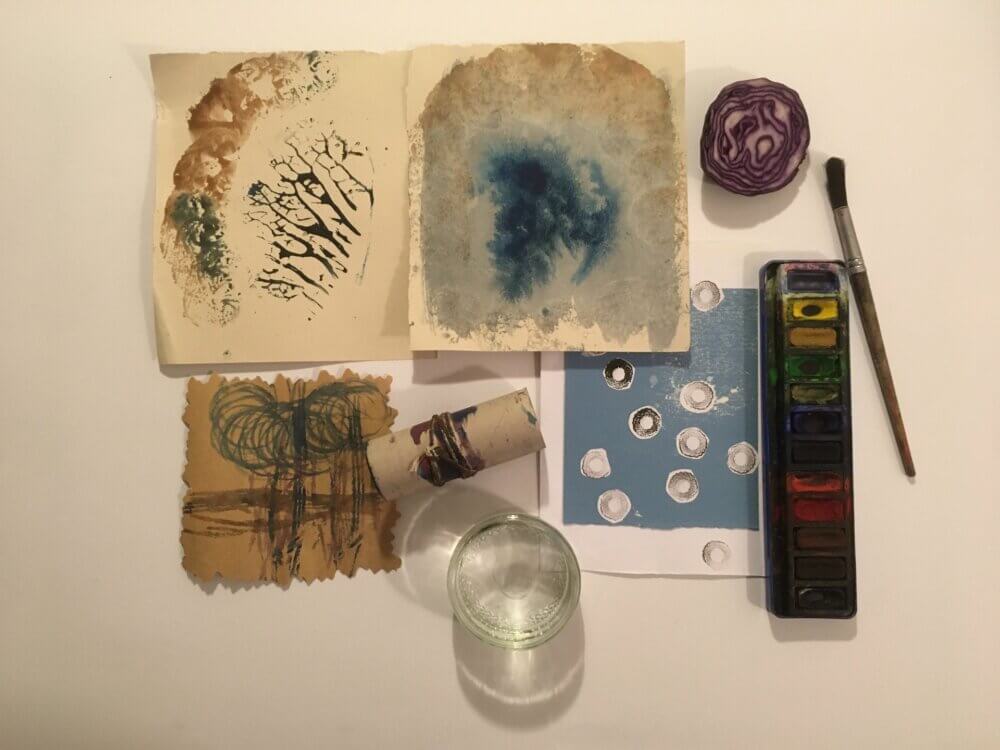
- Printing using vegetables:
Put wet watercolour paint on a vegetable leaf that is sturdy and has veins. (I used a Savoy cabbage). Place your paper on top of the painted vegetable and carefully rub or place the inked vegetable part face down on the paper. Cross sections of white and red cabbages, onions and potatoes are good. Very wet prints, when the paint soaks in and runs, can be exciting too.
- Paper cutting:
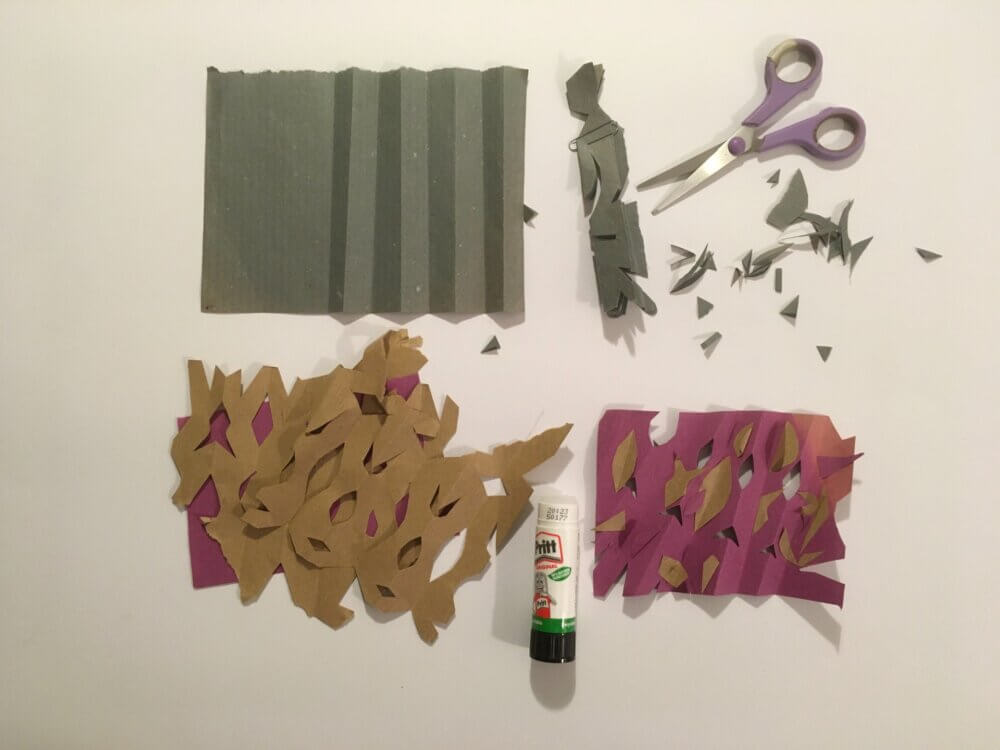
Pleat your paper (folding backwards and forwards). Hold together as a pile. Cut out little shapes from both sides and the ends. Open out.
Make layers of whole sheets of cut papers of different colours.
Keep all the cut bits and glue onto different coloured cut paper sheets.
- More paper cutting: Careful of your fingers!
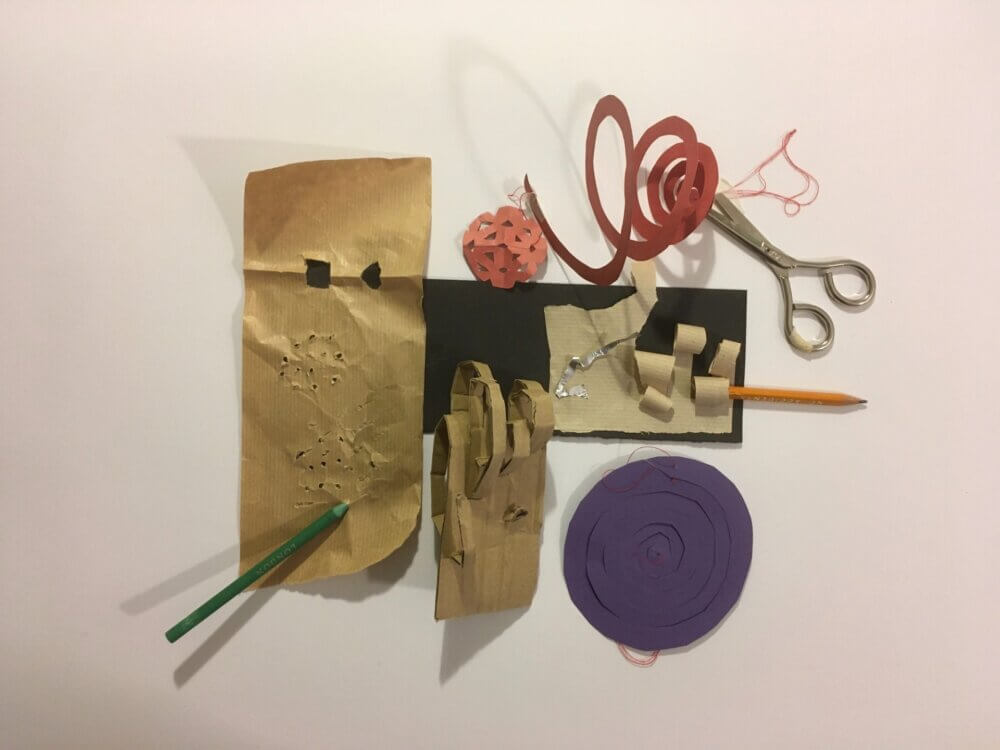
-Make little holes in your paper with a fork or wooden kebab stick.
-Cut some strips part of the way down a piece of card/paper. Curve the straight cut lengths.
-Cut a circle in thin card or paper. Enter outer edge with scissors and keep cutting a smaller and smaller spiral until you arrive at the middle. You can pull out the spiral, attach cotton to the middle end and hang as a stalactite from your grotto ceiling.
- Shiny things:
Pope liked ‘shiny’ geological specimens, semi-precious stones and pieces of mirror for reflections and to catch the light. He was very excited when he found a spring (underground stream) in his grotto.
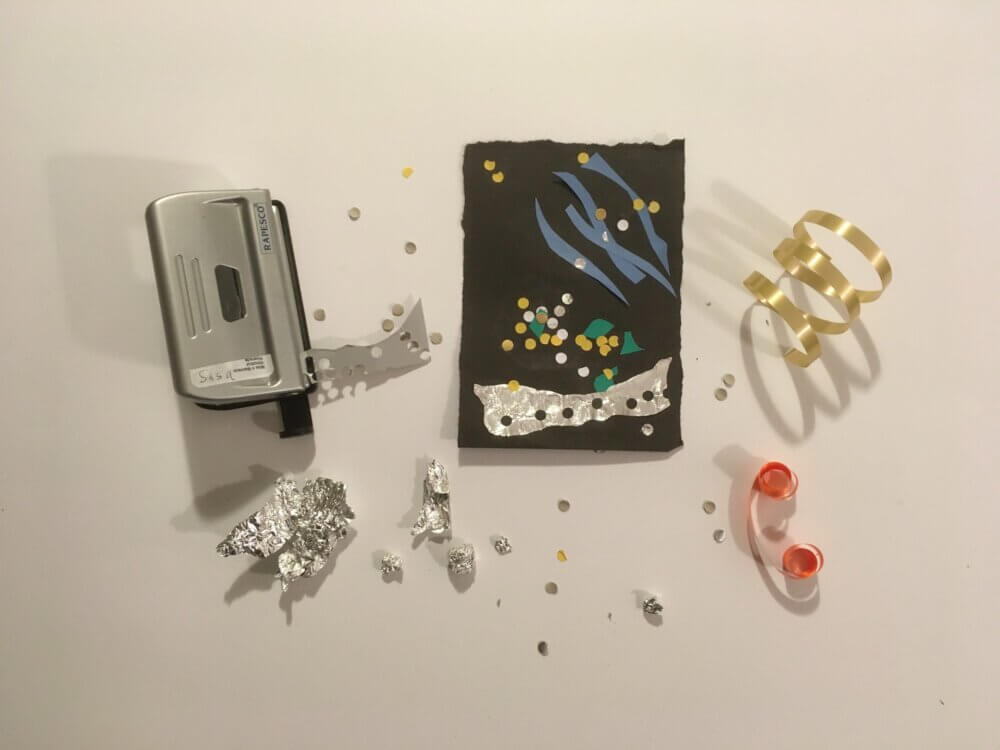
-Make little balls of tin foil.
-Cut circles from shiny paper/card. They will look good on dark papers.
-Make little coils with present-tying ribbon.
-Use a hole-punch for tiny dots to scatter.
-Try making a big star for your ceiling.
- ‘Found’ objects:
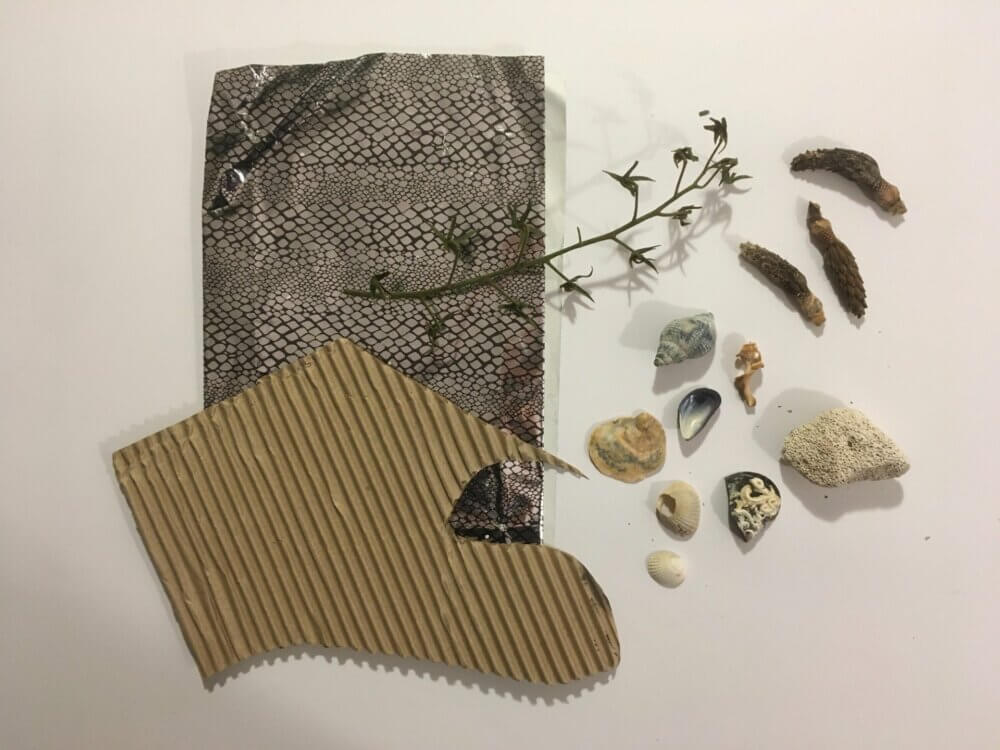
-Look for things from nature which look like rocks and stones such as acorns or pinecones. People loved to decorate grottos with shells.
-Dried bits of plant, if painted, can look like coral. (Mine is the stem of vine tomatoes). Leaves.
-Look for wrapping papers with patterns, corrugated paper, look in old magazines or newspapers.
-Any old jewellery beads or buttons.
– What do you have in your recycling that you can use?
Pope was sent geological specimens from friends all over the world.
- Printed textures:
You can also print some of the textures found on the website of patterns in snow, bark and fungi that you can cut out and collage onto your grotto.
- Freestyle:
Make your own textures however you want.
MAKING THE 3D GROTTO
When you have lots of textures, grab your box from recycling. You may need an adult to help you cut down to make an entrance and so you can get inside. If you don’t have a box, you could roll some card to use. Think about scale. The tiny figures give an idea about size. Think about where the light is coming in. Do you need an entrance and an exit? A door, a gate?
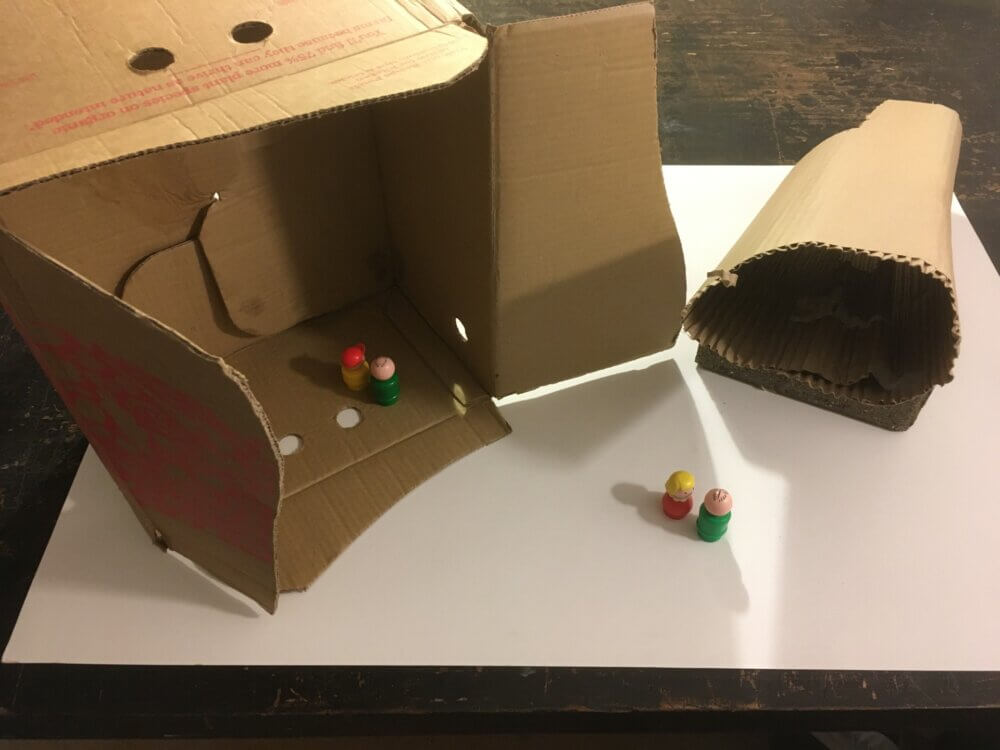
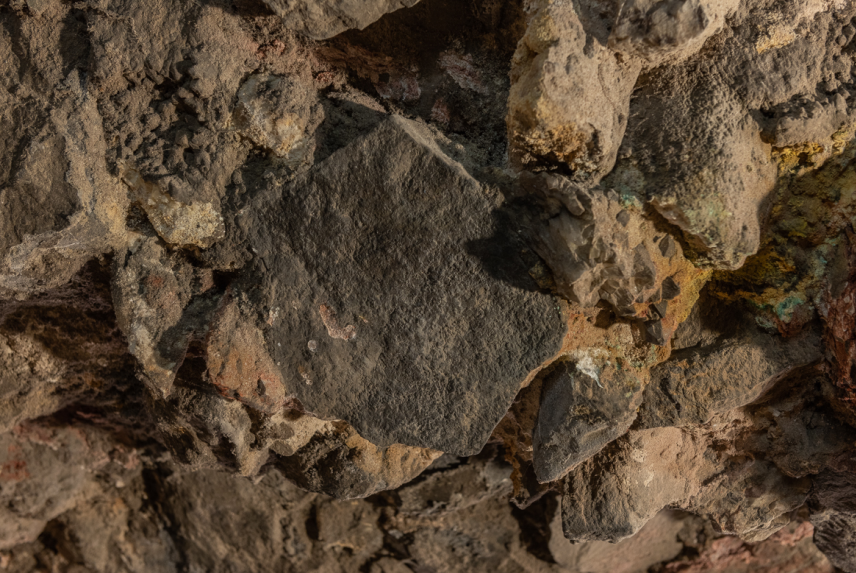
This box will be your grotto and you will decorate the walls and floors with your textures. Look at this picture of a close-up section of Pope’s Grotto to help inspire you. This section shows materials from Giant’s Causeway in Northern Ireland.
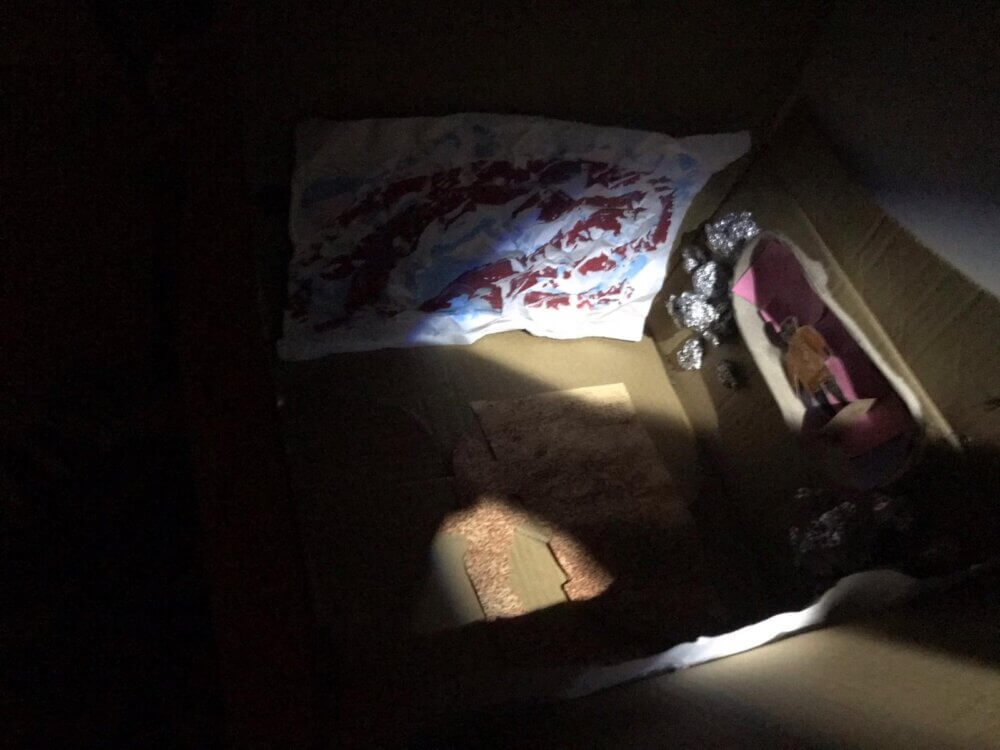
Stick your textures onto the wall with glue. Make sure you use plenty of glue so that it sticks. For heavier objects you may even need to use tape. If you have small figure toys, you can place them inside. You can make a hole in the grotto to shine a torchlight through.
Other questions to think about if you want to:
-Where do you want to locate your Grotto? Above ground or below?
-What is your Grotto for? What will you do in it? Tell stories, talk to friends, whisper secrets, read a book, have picnics?
-Research minerals, shells, dinosaur bones and geological features which you would like to display in your Grotto
-Look in your local environment (home, garden, on walks) for materials and inspiration.
-Experiment with art materials to recreate these textures.
-Look for natural forms in nature which seem like geology but are from the plant world e.g. tree barks, fungi, lichen on branches. Photograph/draw.
-Research other famous Grottos, such as at Hampton Court House Shell Grotto, Painshill Park Crystal Grotto and the Marble Hill House Grotto.
When you have finished your grotto, please do share your creations at #OrleansHouseGallery and complete our survey: Pope’s Grotto and Orleans House Gallery – Family Feedback
Looking for more activities? Click here for more ideas to do with your family: